Getting Started
This guide walks you through the essential steps to start using Yellow Card's API - from securing your account to making your first API call. Follow these steps in order to set up your development environment, configure webhooks, and understand our payment flows. Most developers complete initial setup in under 30 minutes.
1. Access the Treasury Portal
Set up your secure account access
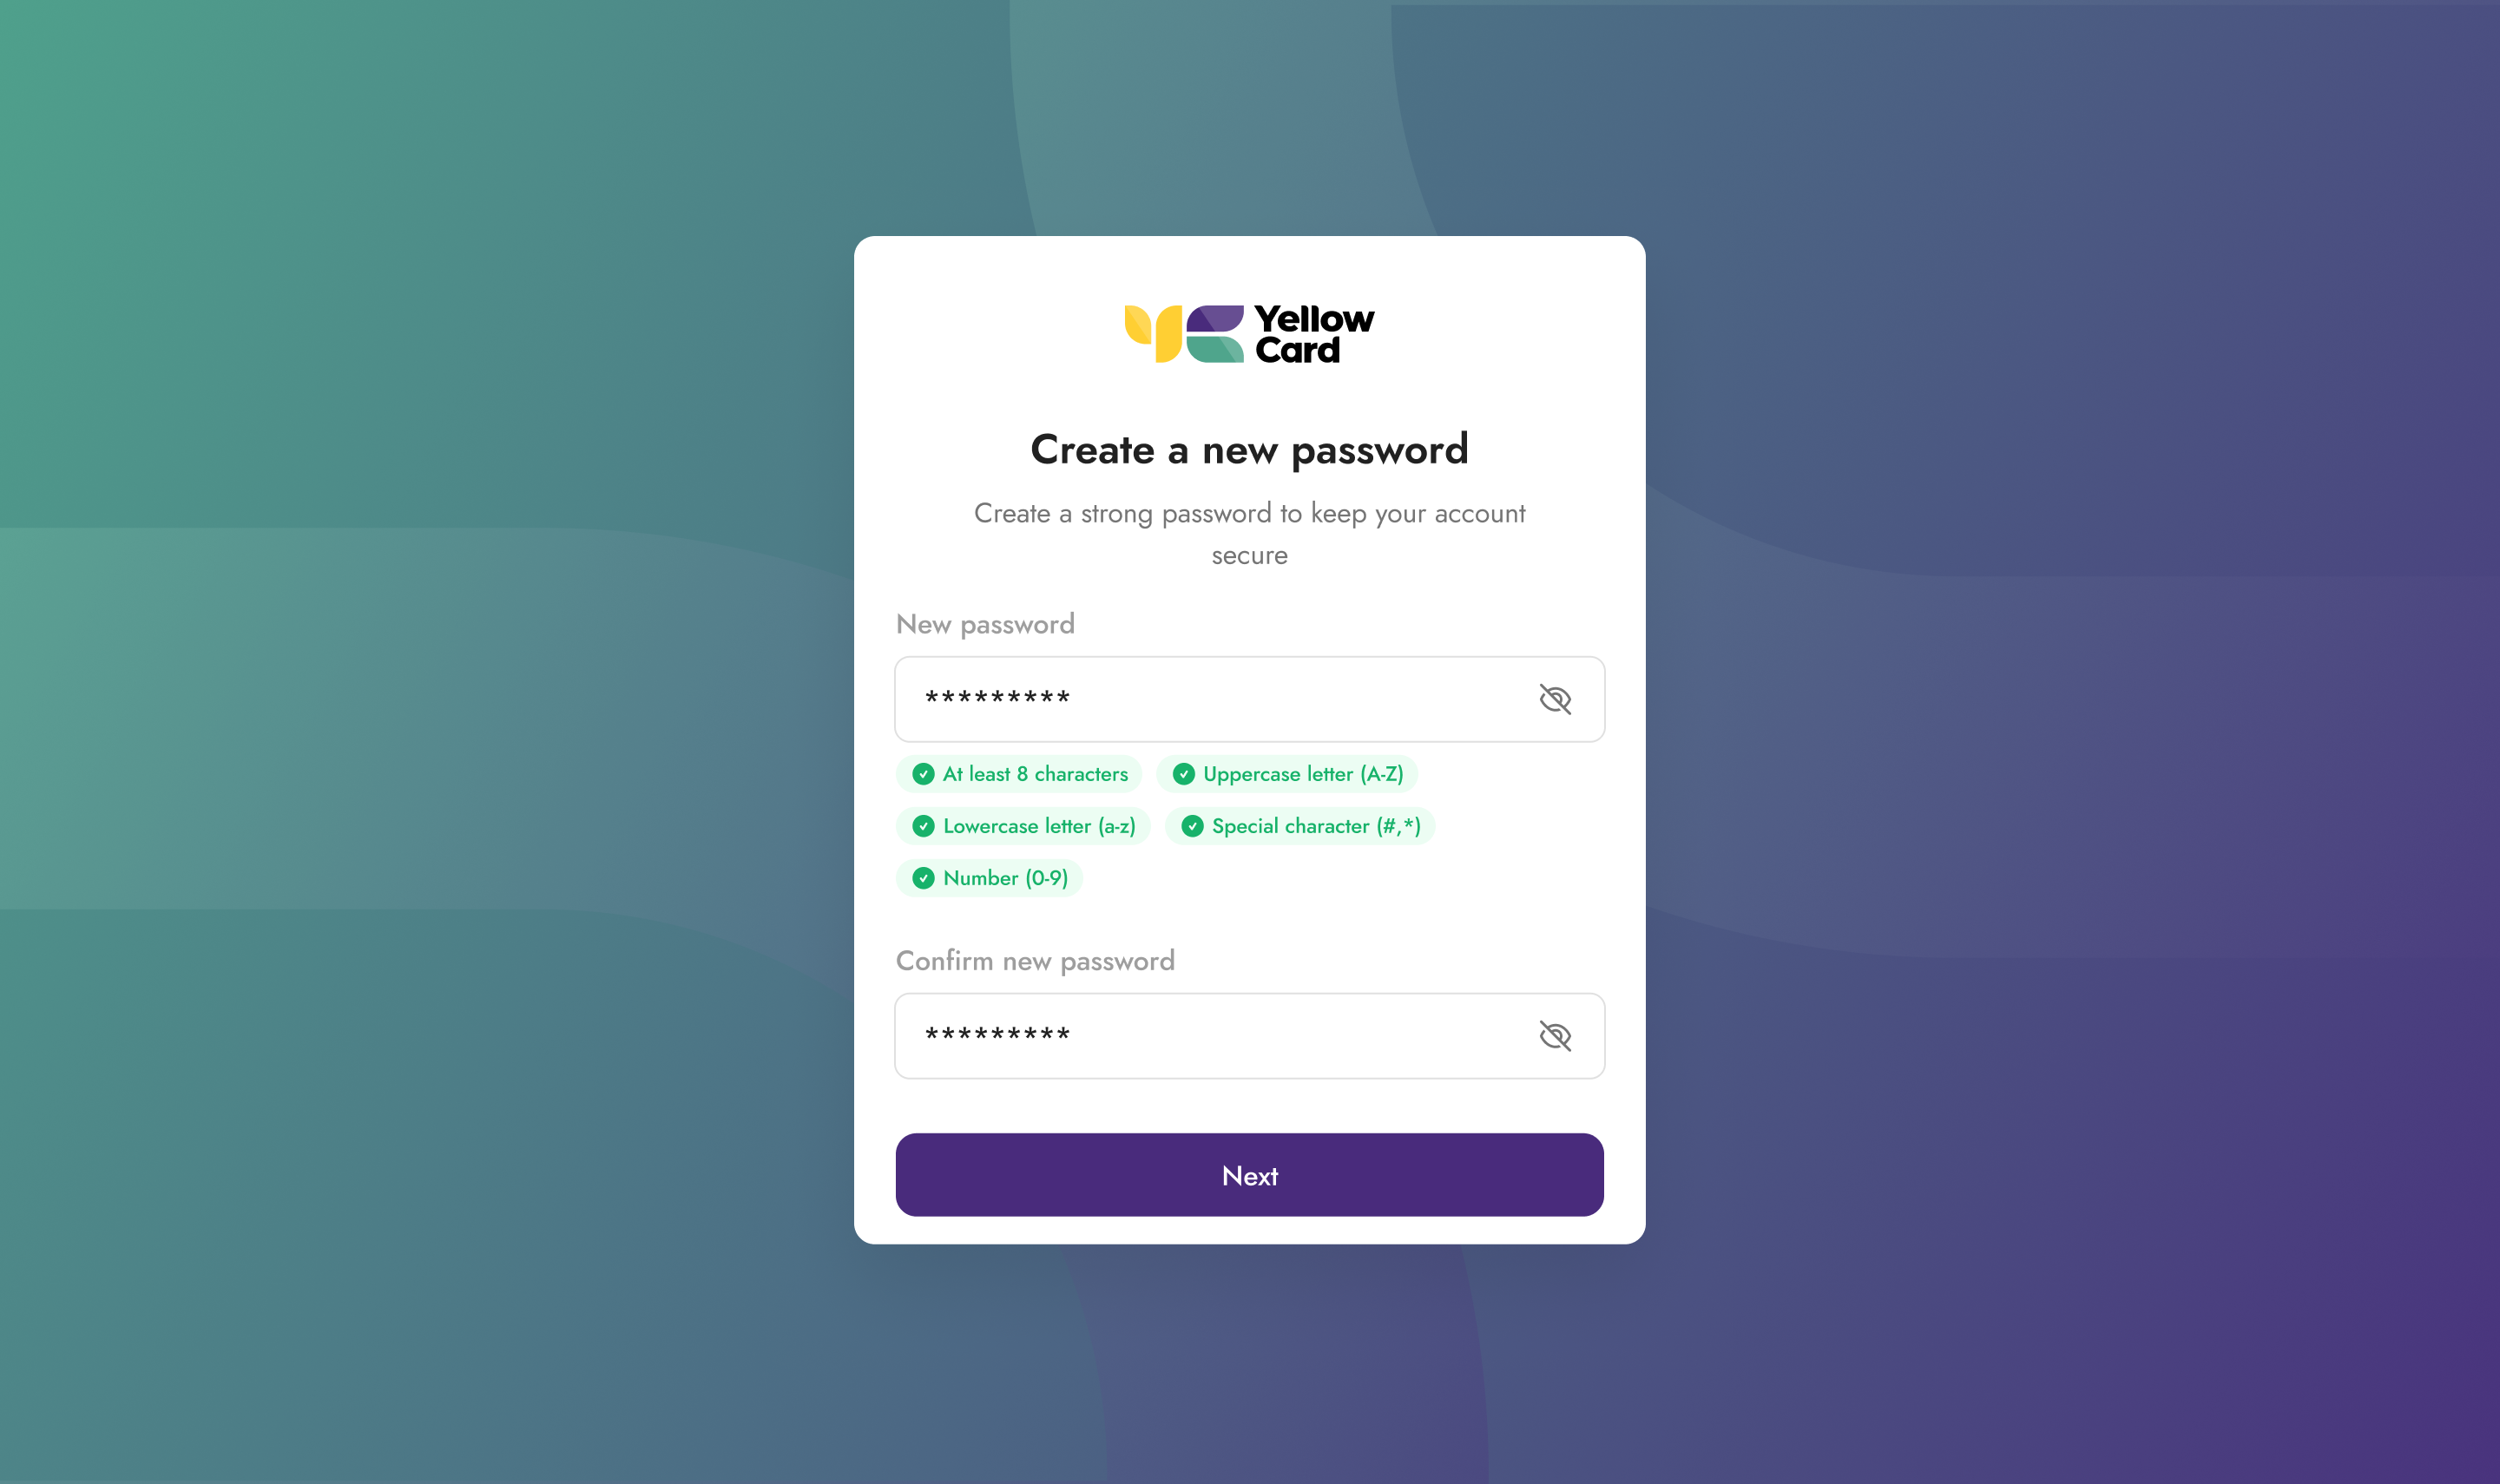
You'll receive an email invitation with a temporary password to access the Yellow Card Treasury Portal. On your first login, you'll be required to:
- Create a new password - Choose a strong password that meets our security requirements
- Enable Two-Factor Authentication (2FA) - Download Google Authenticator or Authy on your mobile device and scan the QR code to link your account
Security Note: 2FA is mandatory for all portal access. Keep your 2FA device secure and save your backup codes in a safe location.
What you can do in the portal:
- Generate and manage API keys
- Configure webhooks
- View transaction history
- Monitor account balances & initiate withdraws
- Manage wallet addresses for deposits and withdraws
- Manage team member access
2. Generate Your API Keys
Create credentials for sandbox and production environments
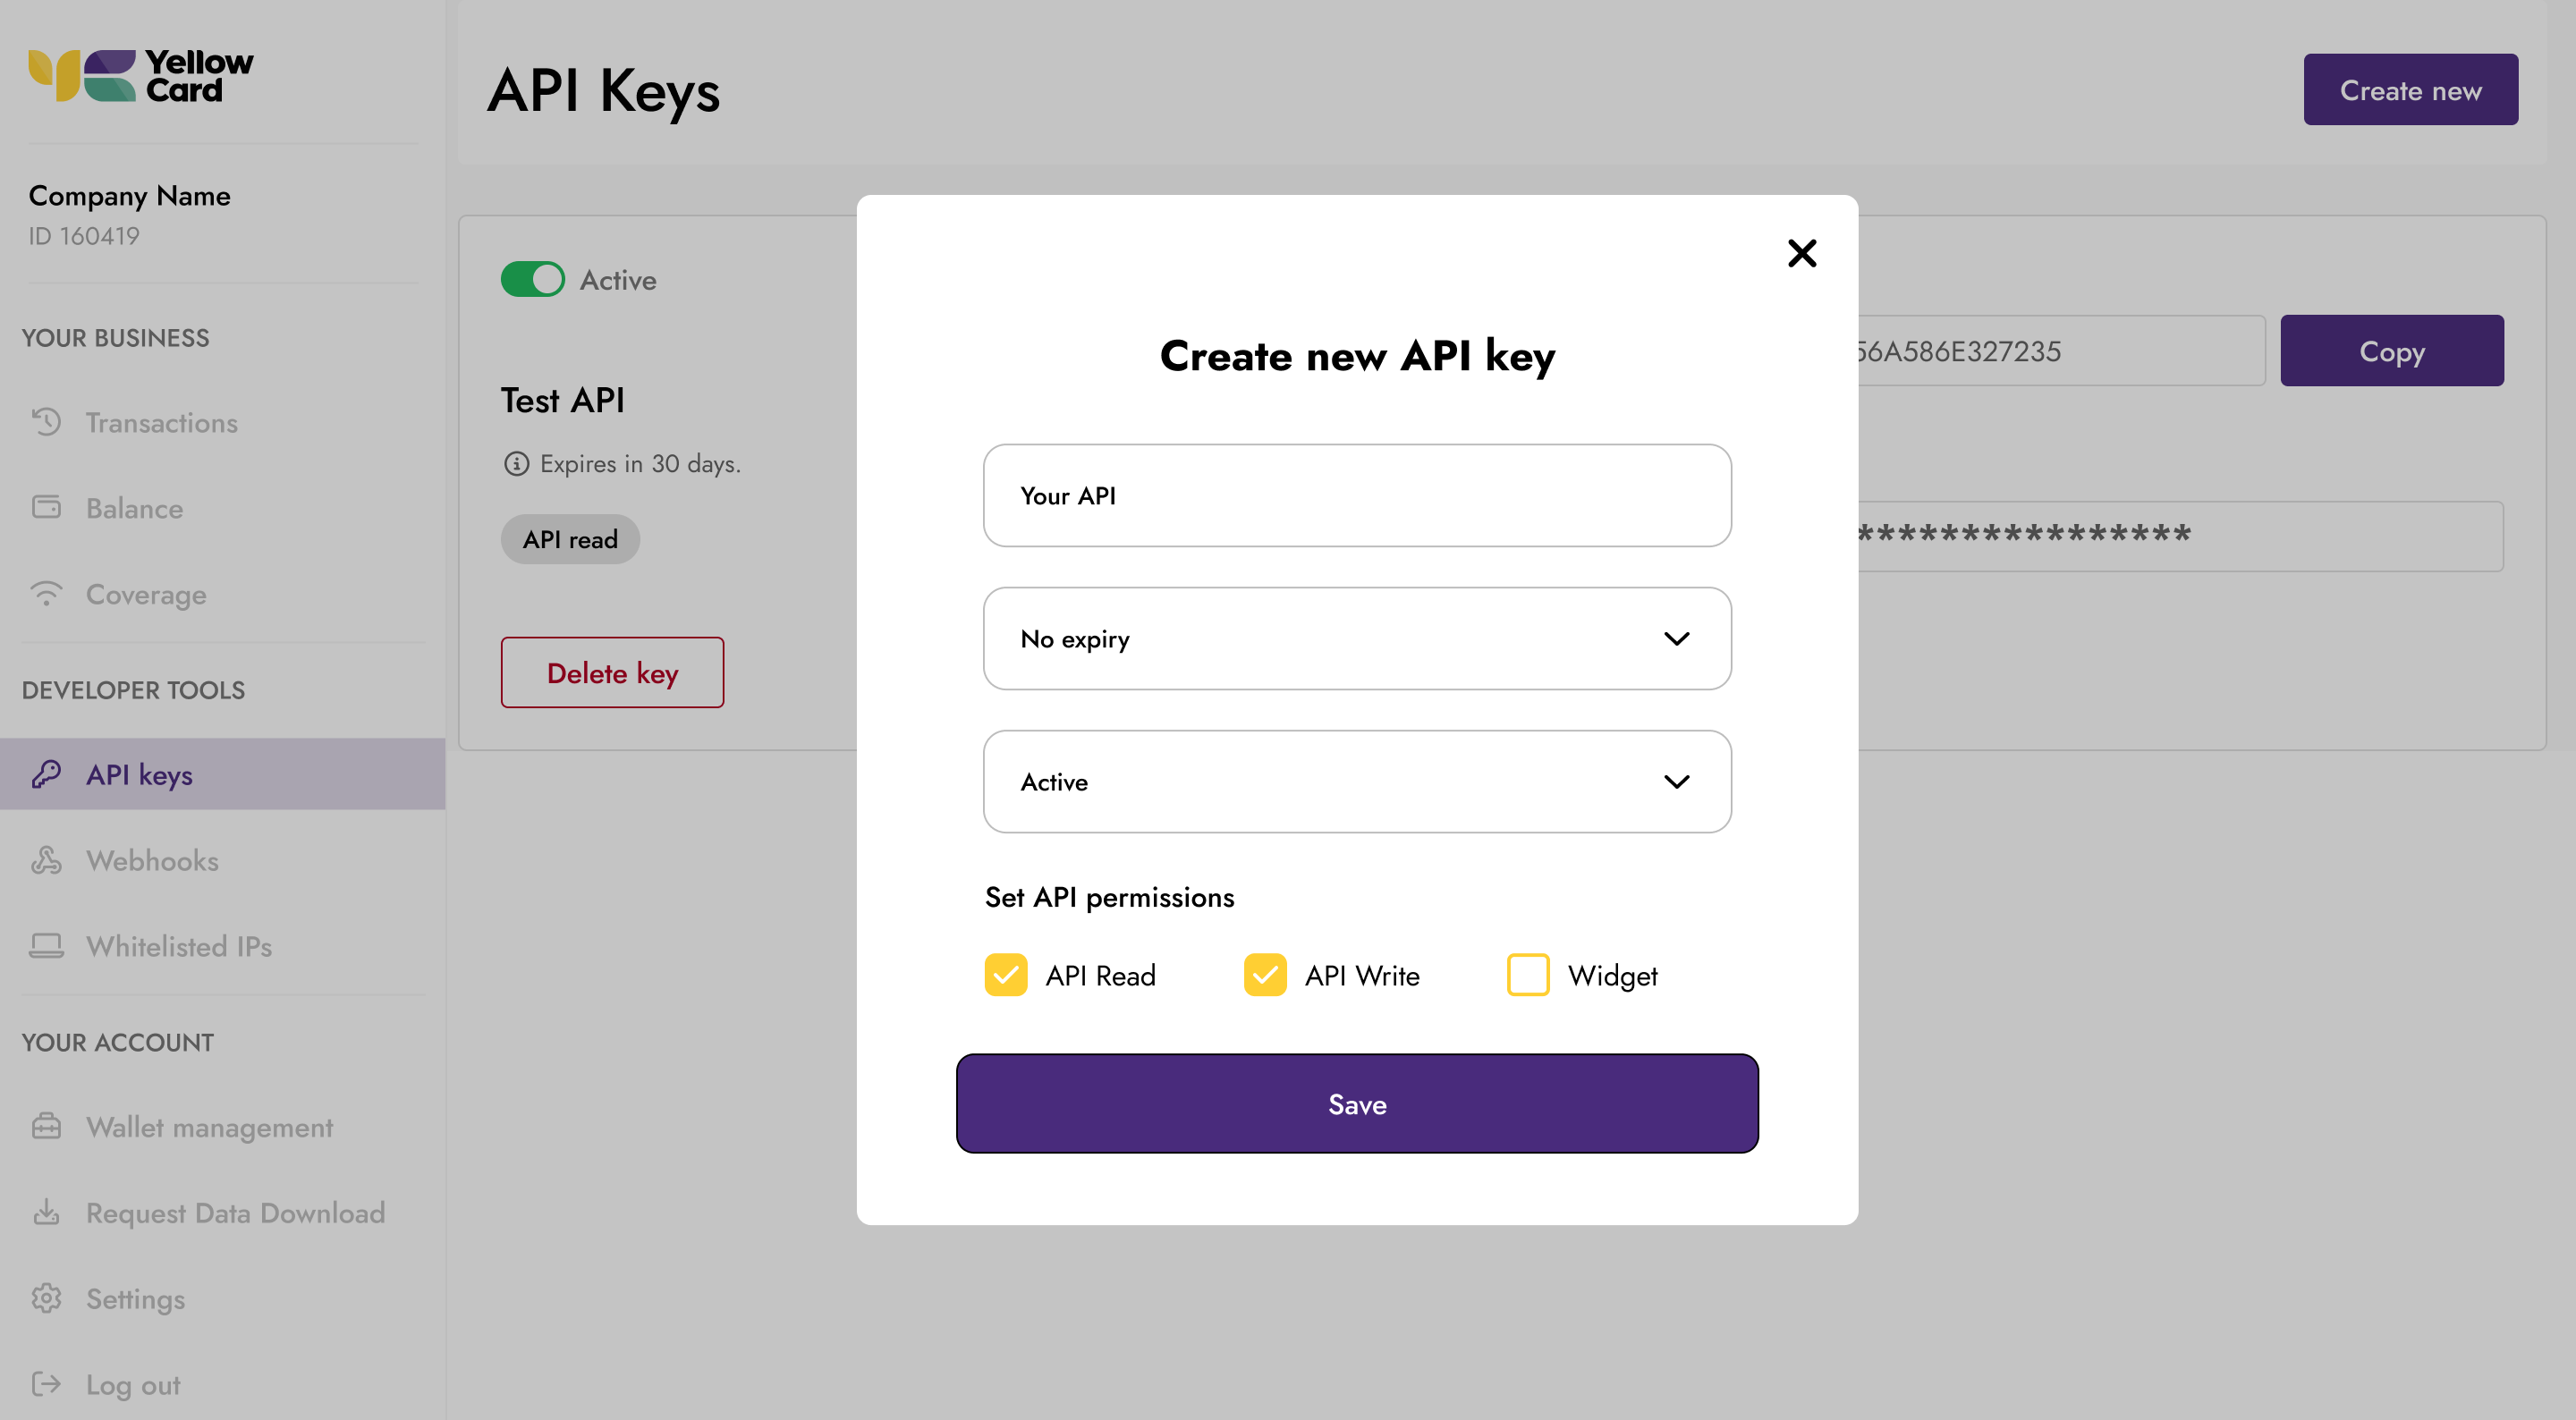
Once logged into the Treasury Portal:
- Navigate to API Keys
- Click Create New
- Set API permissions based on your needs:
- API read - Get resources channels, rates, payment
- API write - Creating new resources on the API, collection request, payment request, settlement
- Save your API secret key.
Important: Treat API keys like passwords. Never commit them to version control or share them publicly. Use environment variables in your code.
Best Practices:
- Use separate keys for different services
- Rotate keys periodically
- Revoke unused or compromised keys immediately
- Use the minimum required permissions for each key
3. Configure Webhooks
Get real-time notifications for transaction events
Webhooks allow Yellow Card to notify your application when events occur, eliminating the need for constant polling.
Setting up webhooks:
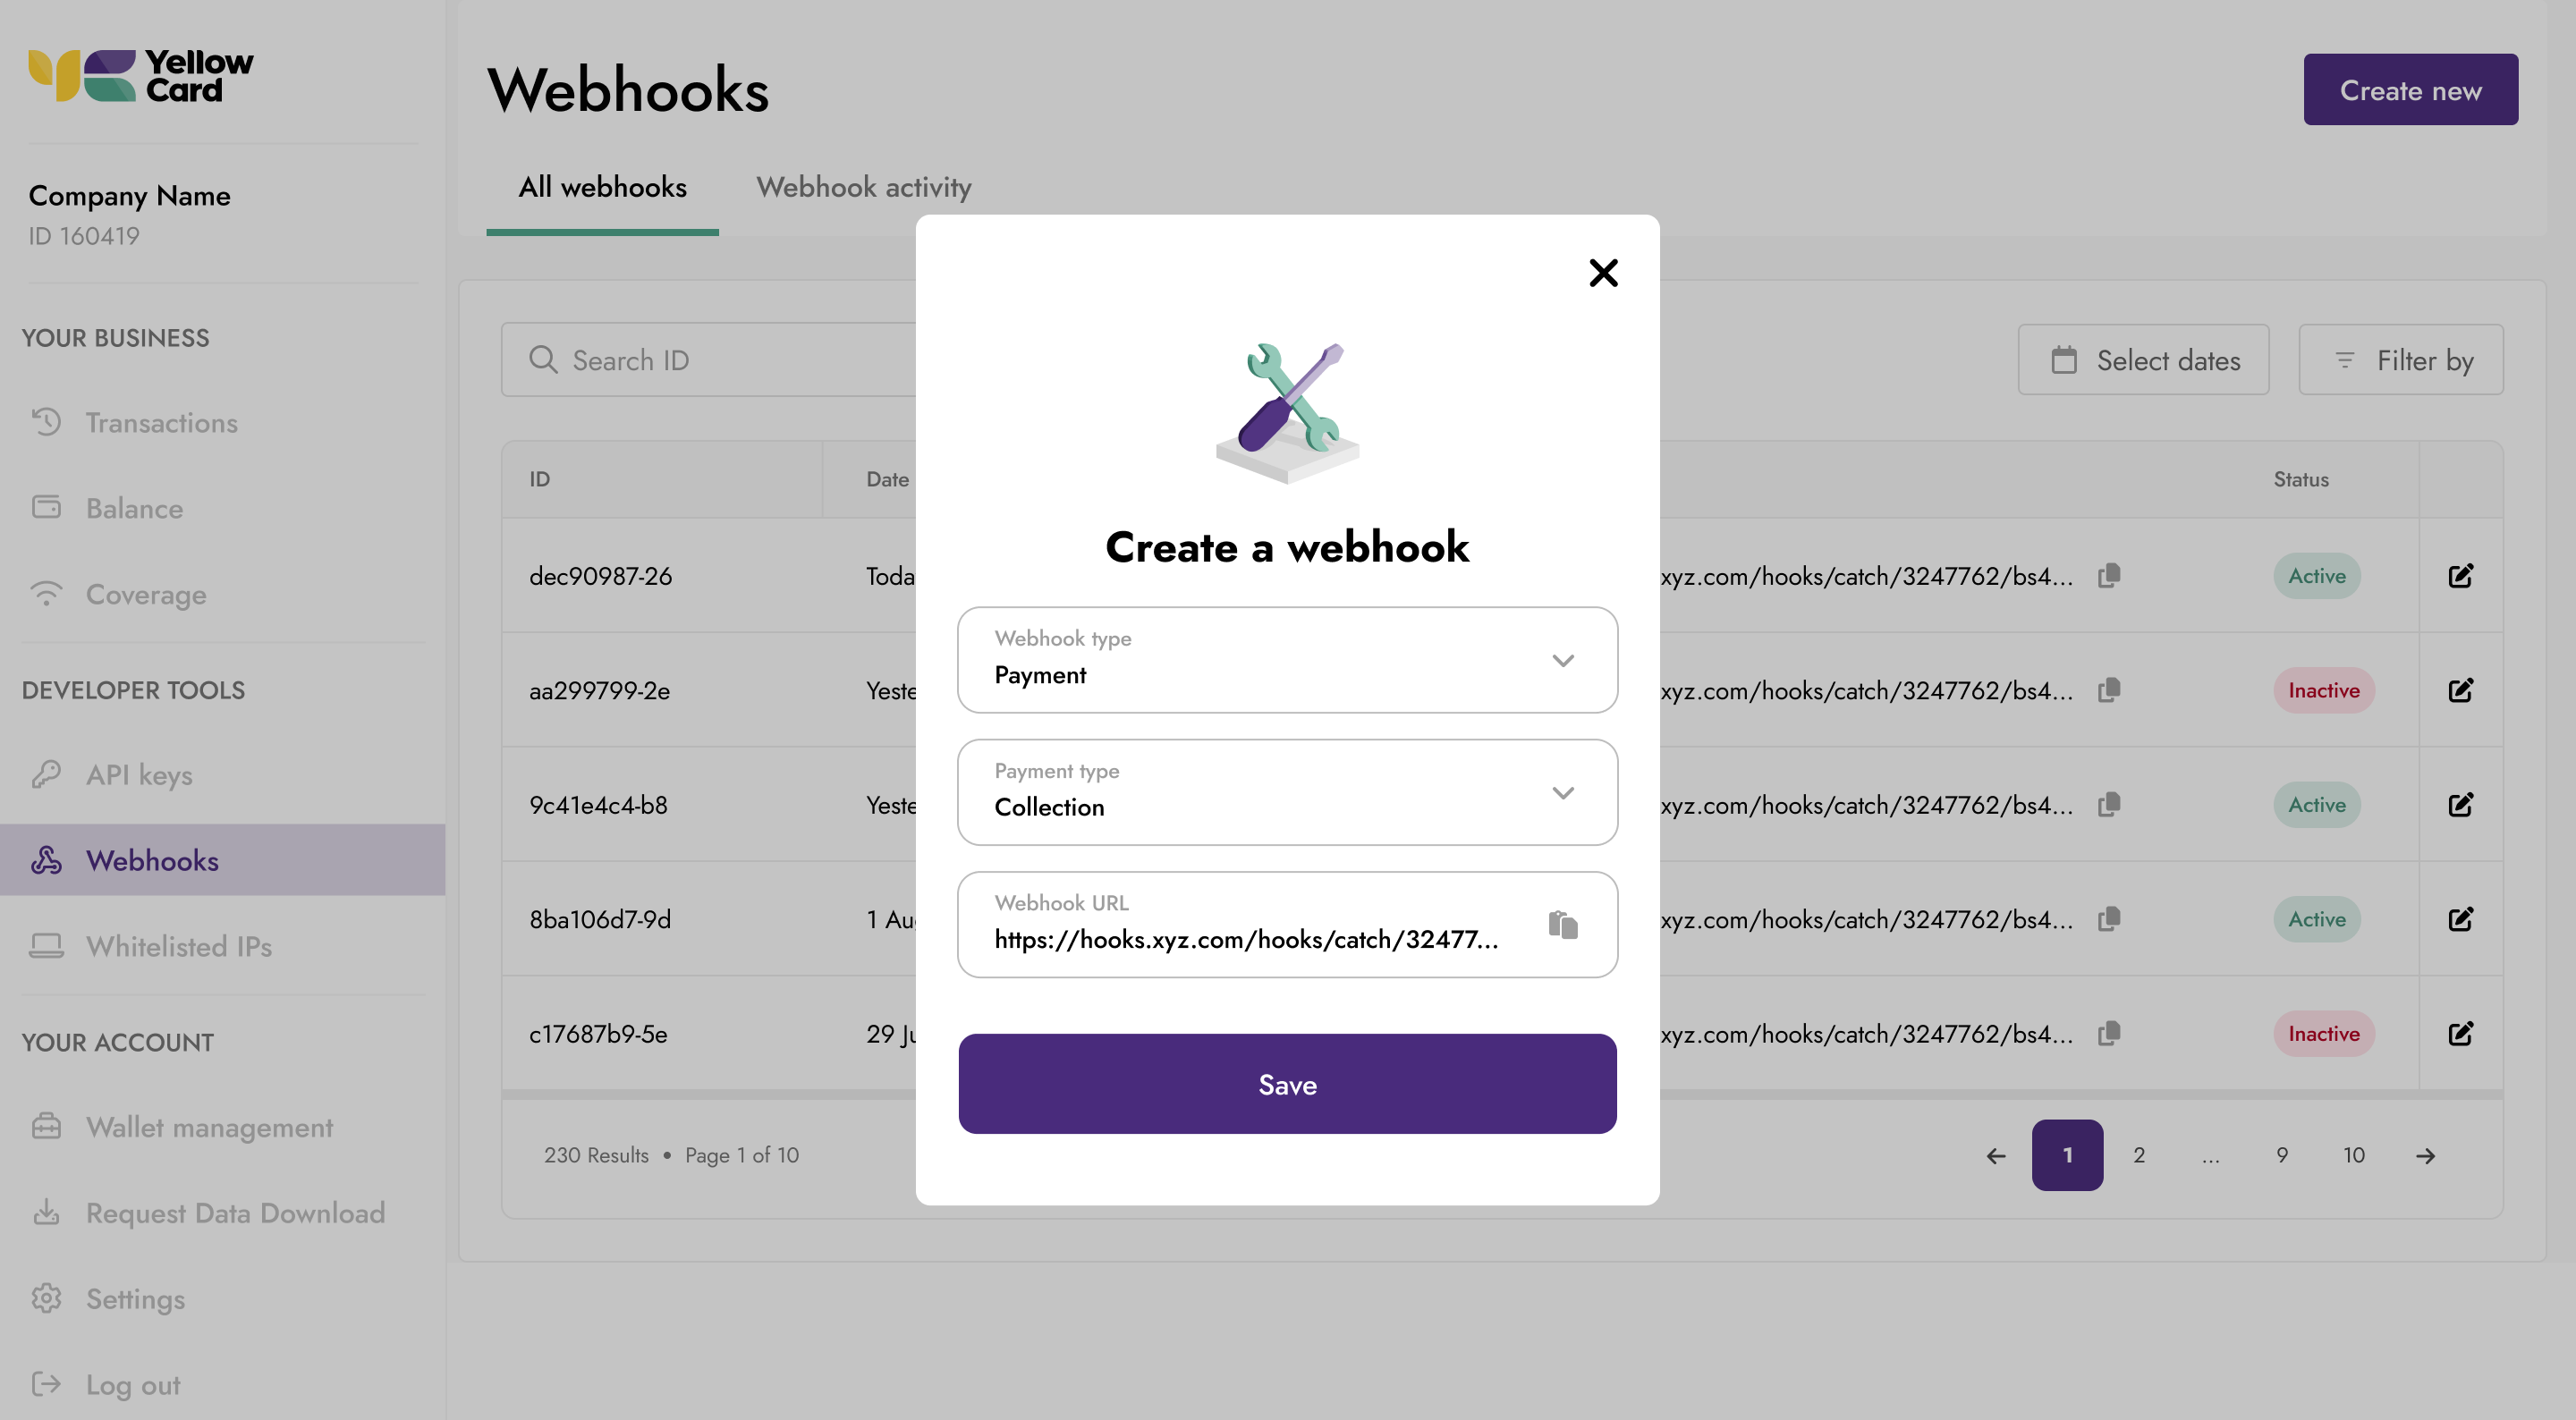
- Go to Webhooks in the Treasury Portal
- Click Create New to create a new webhook
- Choose a transaction type
- Payments - Disbursement status updates
- Collections - Collection status updates
- Settlements - Balance Payout / Topup updates
- All Events - Subscribe to everything
- Choose an event state
- Enter your webhook URL (must be HTTPS)
- Save your webhook
4. Understand Payment Flows
Learn how receives and sends work
Fiat Receives
Collect fiat from your customers based on available payment methods (Bank Transfer, Mobile Money) for that country. To view the full receive flow see Making a Receive .
- Create a receive request specifying payment method, country and amount you want to receive from your customer.
- For Bank Transfer payment method, Yellow Card returns a bank account number for your customer to make payment into.
- For Mobile Money payment method, the customer will receive a USSD prompt from their Mobile provider which the customer has to approve.
- When the receive request is successful, Yellow Card sends a webhook to your configured webhook endpoint and credits your USD float account balance.
- Verify the webhook signature, and transaction status. This confirms specified fiat amount has been collected from the customer successfully and credited into your float account balance.
Webhook notifications
if your webhook is configured to listen to all events, you will get webhook notifications for every transaction state change: created -> process -> pending -> complete.
Fiat Send
Send fiat amount to your end customer via Bank Transfer or Mobile Money depending on the payment method available in the country. Your USD primary vault is used to facilitate the fiat payout in all of our supported countries. To view the full send flow see Making a Send.
- Pre-fund your USD primary wallet by sending any USD Stablecoin to your receive address.
- You'll find the receive address per Stablecoin in the Top-up flow under the balance tab in the Treasury Portal.
- Create a send request. Specify payment method, currency, amount, destination details.
- The destination details is your end user's account info (Bank Account number and Bank / Mobile Money Phone number and institution).
- Yellow Card debits your USD primary wallet and we start the transfer of fiat to the customer's Bank/Mobile Money account.
- On successful send, you receive a webhook for complete payment and your customer's money is in their bank account.
Webhook notifications
if your webhook is configured to listen to all events, you will get webhook notifications for every transaction state change, created -> process -> pending -> complete.
5. Handle Errors Gracefully
Build robust integrations with proper error handling
Whenever your API requests fail, the response returned has the following schema.
{
    "code": "SampleErrorCode",
    "message": "human readable error message"
}- The error code provides more context on the type of error aside from the http status code.
- This allows you to map certain error codes in order to provide an improved experience and feedback to your customers.
Here is a list of error code, and what they mean
6. Test in Sandbox Environment
Safely develop and test without real money
Yellow Card provides a complete sandbox environment that mirrors production functionality.
Updated 3 months ago